Hi Tristan,
Yes, that is right, from a modelling point of view the VIIC and VIIC/41 will look the same.
It has long been thought that the Atlantic bow was exclusive to VIIC/41s but there are several photos which prove this is not the case. The link to the photo of U 278 posted by SG is a good example. The boat is a VIIC but has the Atlantic bow.
Your model will have a planked deck and Atlantic bow. For the discussion below the dates below are the launching dates. The colour photo below is very useful because it shows all four boats with different arrangements. Taken in Hammerfest on the 30th July 1944, it shows - from right to left - U 997, U 278, U 711 and U 362.
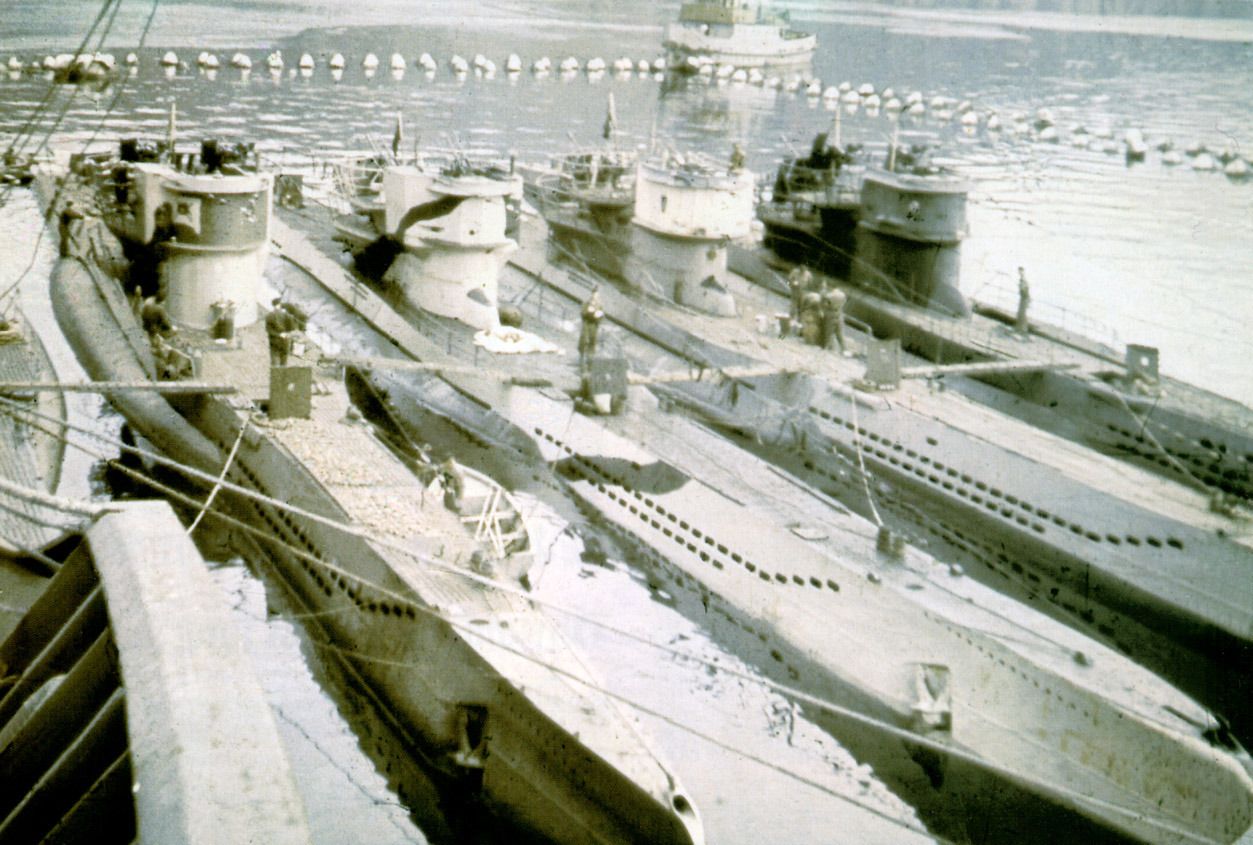
Firstly, the Atlantic bow. The Atlantic bow is on U 711, launched on 25/06/42. It is not on U 362, launched on 21/10/42. So we can see that it was implemented on launched boats as early as June 1942 but in boats launched in other shipyards the Atlantic bow had yet to be implemented by October 1942. It probably was implemented on all launched boats by around December 1942.
Secondly, the planked deck. The slotted deck is on U 711, launched on 25/06/42. The planked deck is on U 362, launched on 21/10/42. From other photos it appears the changeover from slotted to planked took place around the autumn of 1942.
Note: In the photo U 362 has planked deck and no Atlantic bow. U 711 has the slotted deck but does have the Altantic bow. Very confusing, I know, but this illustrates that the bow and deck changeovers were completely independent of each other.
Conclusion - To conclude, I reckon you should choose a boat (either VIIC or VIIC/41) launched in December 1942 or later so you can be sure it had both the Atlantic bow and planked deck.
Schnorchel - We can't forget that your model will have the snort. This is an additional complication. If you have a look at the photo above, taken on 30/07/44, U 278 doesn't have the snort yet. It was fitted at a later date (probably soon afterwards) but may not have retained the camo scheme above.
U 997 is in the configuration you want and did serve in the Arctic. You can also be sure of the colour scheme from the photo above so you might consider this boat for your model.
Regarding colours, the photo of U 805 after surrender shows extensive rusting, which you don't tend to see on VIICs.
Cheers,
Dougie

