Author Topic: U-45 WIP - Completed October 2019  (Read 105663 times)

0 Members and 6 Guests are viewing this topic.

Offline Mr. Bill

  • Commander
  • *
  • Posts: 274
Re: U-45 WIP
« Reply #120 on: 28 Mar , 2010, 17:19 »
New progress on U-45:

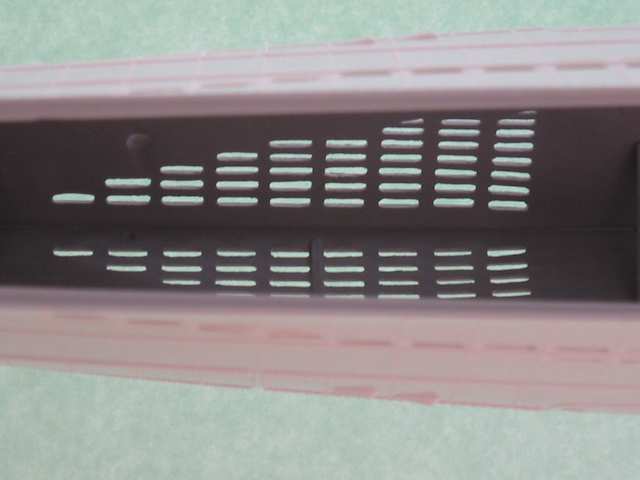
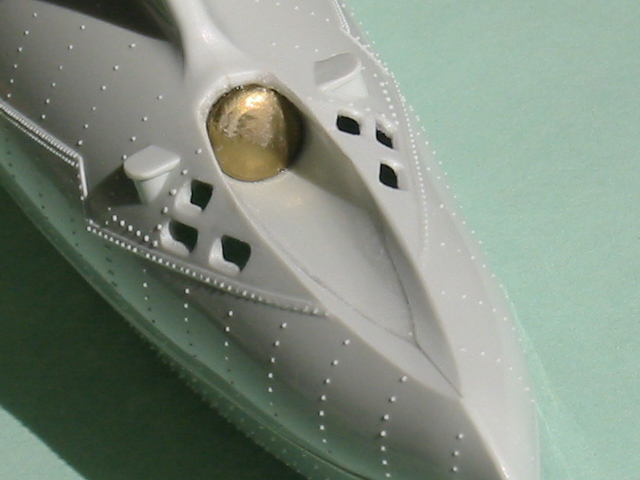
First image shows an interior view of the bow flood vents following primer coat and without interior structure in place


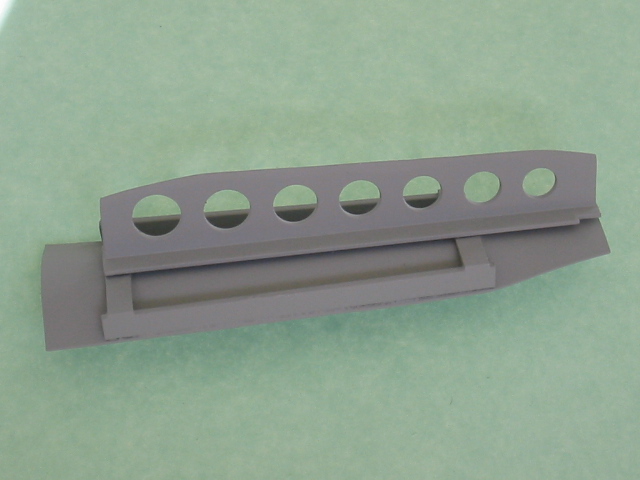
Here is the interior structure for the bow after a coat of primer


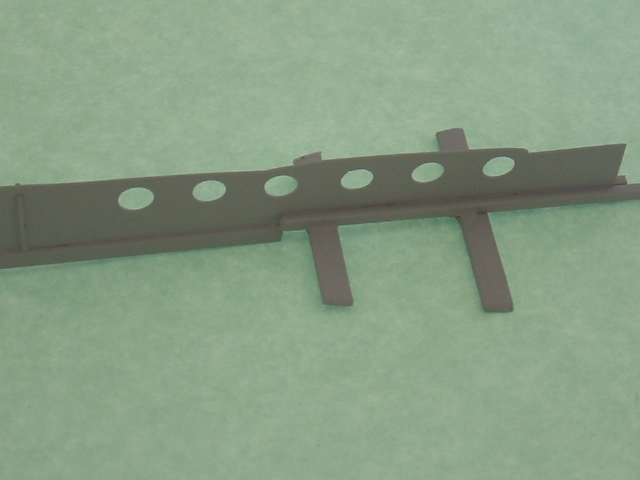
And the interior structure piece for the stern after a coat of primer


Hard to see, but this is the interior structure for the torpedo tube flood vent area following application of primer coat.  Once the deck is in place, this area will be nearly impossible to see


Aft torpedo tube area with torpedo tube door fitted.  I used a rounded head brass tack for the door


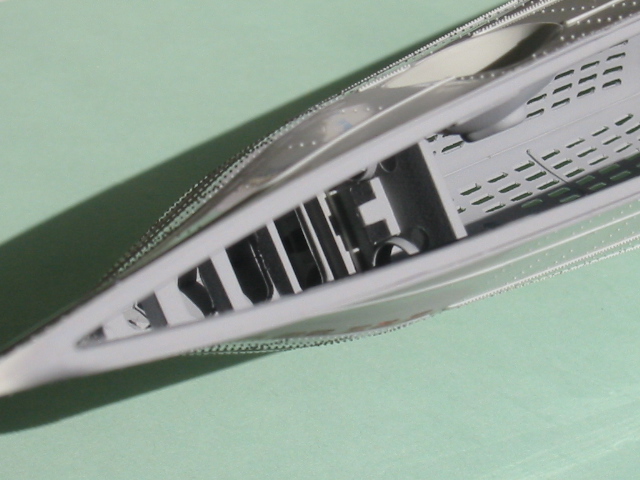
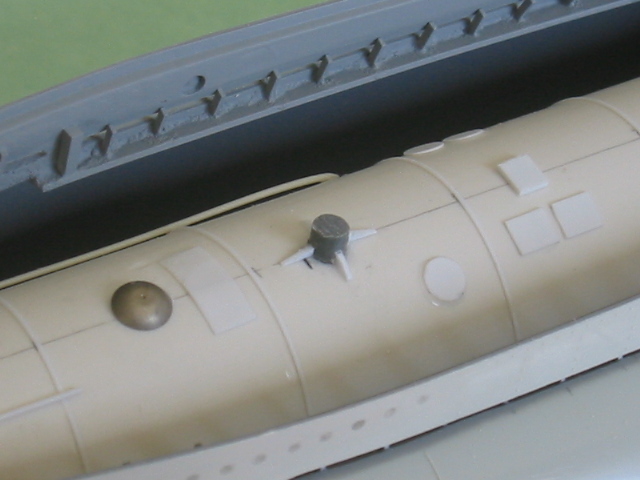
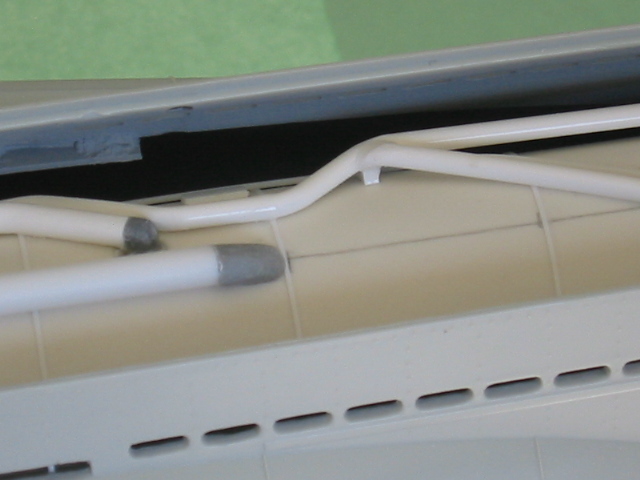
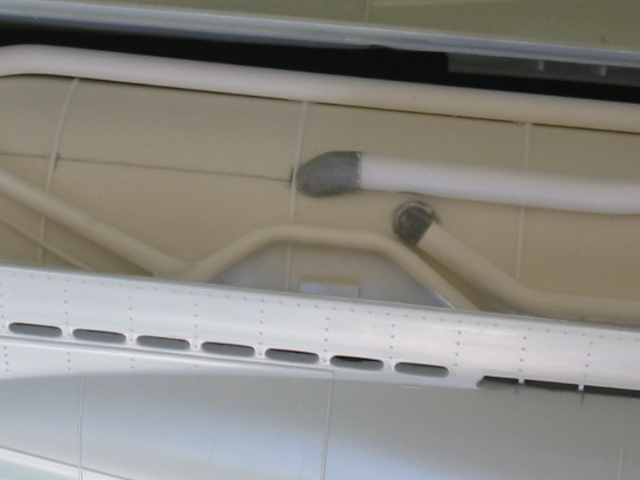
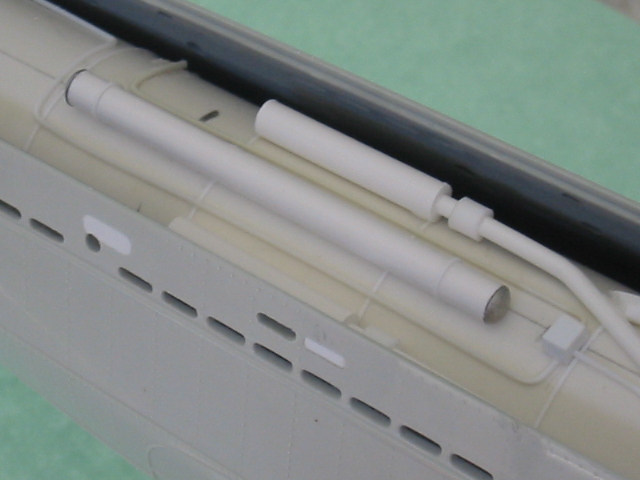
The following are several images of the scratch built pressure hull.   After some testing, I was surprised how very little can be seen of the pressure hull once the deck is in place.  Even under bright sun conditions, very little detail can be seen through the flood vents and the deck.  However, something is needed or the light shines right through the flood vents.  After careful consideration and some experiments, I decided to take an approach that is very simple, but provides some basic details for the pressure hull.  Basically, I cut down a length of ABS irrigation pipe with a diameter that fit best into the hull.  The ends were too wide, so I had to reduce the outside diameter with a power sander to fit the pipe into the hull.  The draw back with using a constant diameter pipe for a pressure hull is that if the ends fit tight, the centre area has a large gap between the pipe and the insides of the hull.  Not really a problem as once the deck is in place, this gap is invisible.  Once I got the pipe to fit at the bow and stern, I used a variety of items to add the pressure hull details.  Mostly stock styrene, especially tubes and rods along with stuff from the spares box and other items.  I used diagrams from various reference books as a guide for the details along with some photos of the Yankee Model Works resin pressure hull.  I had to make some compromises so that everything could fit, but in general this was a very easy way to add lots of basic detail for the pressure hull.  I had to keep reminding myself to limit the detailing as most of this area is almost invisible once the deck is in place.  I have painted the hull with a primer coat just now and will post photos later today once it has dried a bit.


Please let me know if you have any questions or comments!

Cheers,

Bill
« Last Edit: 21 Apr , 2018, 07:25 by Mr. Bill »

Offline Mr. Bill

  • Commander
  • *
  • Posts: 274
Re: U-45 WIP
« Reply #121 on: 28 Mar , 2010, 17:55 »
And some views of the pressure hull following a coat of primer. 


That's all for now, please let me know if you questions or comments.

Cheers,

Bill
« Last Edit: 21 Apr , 2018, 07:29 by Mr. Bill »

bracco_n

  • Guest
Re: U-45 WIP
« Reply #122 on: 28 Mar , 2010, 18:43 »
That'll do just fine Mr Bill, good work!

Offline Rokket

  • Administrator
  • *
  • Posts: 2,362
  • Gender: Male
  • Submarine Enthusiast
    • AMP - Accurate Model Parts
Re: U-45 WIP
« Reply #123 on: 28 Mar , 2010, 23:49 »
Very nice detail and work, and especially the use of the brass tack! Well done.
AMP - Accurate Model Parts - http://amp.rokket.biz

Offline Greif

  • Admiral2
  • *
  • Posts: 755
  • Gender: Male
Re: U-45 WIP
« Reply #124 on: 29 Mar , 2010, 09:45 »
U-45 is coming along very very nicely Bill.  Your interior looks way better then mine did.  Beautiful work!

Ernest

Offline Mr. Bill

  • Commander
  • *
  • Posts: 274
Re: U-45 WIP
« Reply #125 on: 29 Mar , 2010, 10:05 »
Thanks for the comments!  Once I fit the pressure hull permanently into place I will concentrate on the deck.

Cheers,

Bill

Offline Pepper-mint

  • Commander
  • *
  • Posts: 343
  • Gender: Male
  • U-1299
Re: U-45 WIP
« Reply #126 on: 30 Mar , 2010, 03:43 »
Amazing work Mr. Bill !!!  :o :o :o

I like it very much.

Laurent.
On the W.bench :
Books, pics, drawings, styrene, dreams and :

Offline Mr. Bill

  • Commander
  • *
  • Posts: 274
Re: U-45 WIP
« Reply #127 on: 08 Apr , 2010, 12:25 »
Greetings!

More progress on U-45.  First group of photos show the bull nose.  I removed and then modified the Revell steel fore deck section rather than use the Amati brass part as it was too narrow and the tread plate pattern did not look right.  One of the modifications necessary on the Revell part is to relocate the bull nose forward.  I used styrene tube and drilled out the interior so as to thin the thickness of the tube wall.  Carefully filed a grove in the upper stem of the bow as seen in photos of this area on real boats.  Finally added the net cutter attachment bracket and contoured sanded the assembly.


Modifications to the steel fore deck included drilling out the circular grate and installing a spare PE part to simulate the grate.  Also salvaged the brass net cutter attachment brackets from the Amati part.  Finally added a very thin styrene hatch cover to the very end of the fore deck as seen in my reference photos.  Still need to drill a hole for the flag staff located just behind the bull nose on the port side.  The Brass main deck behind the styrene fore deck is only dry fitted in these photos.


Last photo for this session shows a comparison of the Amati and Revell stern steel deck section.  I was initially going to use the Amati part, but the modification needed to the Revell part are easier than struggling with the thick brass of the Amati part.


Many thanks everyone for your contributions, your comments and questions are always welcome!

Cheers,

Bill
« Last Edit: 21 Apr , 2018, 07:33 by Mr. Bill »

Offline Jan

  • Lt Cdr
  • *
  • Posts: 103
  • Gender: Male
Re: U-45 WIP
« Reply #128 on: 08 Apr , 2010, 15:00 »
Wow, looks good! I

Offline Mr. Bill

  • Commander
  • *
  • Posts: 274
Re: U-45 WIP
« Reply #129 on: 08 Apr , 2010, 22:02 »
Hello Jan!

Thanks for your kind words, I appreciate your comments.  I can't immediately remember the dimensions of the various size tubing I used for the pressure hull, but I will take some quick measurements tomorrow and let you know.

Cheers,

Bill

Offline Mr. Bill

  • Commander
  • *
  • Posts: 274
Re: U-45 WIP
« Reply #130 on: 08 Apr , 2010, 22:24 »
Hello!

More progress photos!  After applying a grimy black wash to the pressure hull I finished it up with some clear flat sealer and installed it into the pressure hull.  This was probably a waste of time and effort, it is nearly impossible to actually see the details and the grimy black wash can't really be seen at all!  Anyway, it is all there now so if anyone looks very close in bright light they might actually see something!

Once I got the pressure hull into place I had to drill a hole through the keel and into the bottom of the pressure hull so I could anchor it permanently into place with a screw.  The head of the screw is inset into the keel and sits flush with the styrene. 

A few minor details need to be taken care of and then the main brass deck can be finally fitted into place.  U-45 is starting to actually look like a U-Boat!


Enjoy the photos and please let me know if you have comments or questions.

Cheers,

Bill
« Last Edit: 21 Apr , 2018, 07:36 by Mr. Bill »

Offline NZSnowman

  • Admiral4
  • *
  • Posts: 2,419
  • Gender: Male
  • U-1308
    • U-1308 - Wikipedia
Re: U-45 WIP
« Reply #131 on: 08 Apr , 2010, 22:46 »

UrpoK

  • Guest
Re: U-45 WIP
« Reply #132 on: 09 Apr , 2010, 00:46 »
Beautifull work Bill!
Awesome pressure hull!!!  :o
Timo

Offline Jan

  • Lt Cdr
  • *
  • Posts: 103
  • Gender: Male
Re: U-45 WIP
« Reply #133 on: 09 Apr , 2010, 04:04 »
Thank you very much, mates!

Offline Rokket

  • Administrator
  • *
  • Posts: 2,362
  • Gender: Male
  • Submarine Enthusiast
    • AMP - Accurate Model Parts
Re: U-45 WIP
« Reply #134 on: 10 Apr , 2010, 00:46 »
Very nice bullnose, and very nice p-hull, impressive
AMP - Accurate Model Parts - http://amp.rokket.biz