Author Topic: 1/72 Revell Type VIIC/41  (Read 40978 times)

0 Members and 2 Guests are viewing this topic.

Offline billp51d

  • Lt Cdr
  • *
  • Posts: 194
  • Gender: Male
Re: 1/72 Revell Type VIIC/41
« Reply #15 on: 25 Aug , 2015, 04:46 »
TristanR...
    It may be a good time to consider verticle structures, gussetts, baffels, etc. that are viewed
through the flood holes along the side of the length of the boat. They don't have to be acurate
but they break up the "see through"when both halves are assembled. Then again... You've probably already considered this. Just my "Two Cents".
     Bill in Delaware..

Offline TristanR

  • Lieutenant (jg)
  • *
  • Posts: 62
Re: 1/72 Revell Type VIIC/41
« Reply #16 on: 26 Aug , 2015, 18:04 »
Thanks Bill, I had totally forgotten about those baffle peices, I'm getting eager to stick the hull together, and that's the type of thing I don't want to forget!  Thanks again for your help! I guess I need one for both the foreward and aft drain holes.

Offline TristanR

  • Lieutenant (jg)
  • *
  • Posts: 62
Re: 1/72 Revell Type VIIC/41
« Reply #17 on: 27 Aug , 2015, 12:04 »

The Nautilus deck is very good. The plank width is a little big, but maybe there is a practical reason for that I've not discovered yet. Laser cutting has to be just so, else you torch your wood, or don't cut all the way through.

These viic/41 boats had a planked deck, whereas the earlier boats had a slotted one.  There are way more images of the slotted deck than the planked one, but the internet does deliver eventually. I just realized the bottom image is from a type IX boat which also has a planked deck with a snorkel...


The Laser I'm using has two modes, 'Raster' and 'Vector'.
Vector, is what you'd think a laser cutter would do, it lasers shapes out of material, it's amazing to watch. 
Raster, is engraving/etching, and works like an old ribbon printer. the cutting head scans left to right and scorches a design, working from the top of the image to the bottom. It's less amazing to watch, but effective.

I must credit Nautilus for their approach to creating the deck, using a mixture of vector cutting and raster engraving. I'm going to go the same route.
After carefully measuring the kit deck, I'm using Adobe Illustrator and attempted to re-create the kit deck's planks layout. I am considering the Eduard photo etch kit in the design, and just trying to make something that looks to scale.

The material is Basswood, more robust than balsa it has a fine grain. It seems to come in 24"x4" planks from the model shop, (which is why you have to split the deck), in a variety of thicknesses.  Nautilus' uses 1/16" which looks to be a good match for the kit deck, I'll try that and 1/32".

These test cuts were done on 1/32, pretty flimsy stuff and easy to burn.

I'm cutting jigsaw style lugs into the two halves, so the lock together on the kit, and also creating a footprint for the conning tower that will sit on top of the deck and further hold the two deck halves together. I had to be careful to leave material to hold all the hatches so they don't fall out when cut.  Easy to forget this when working on the computer.

Below is the pattern. Red is the vector cut pattern, and Blue is the raster part. I'll engrave all the blue first, then send in the red cutter. The Red line has to be a 'hairline' to invoke the laser cuttter, there is a thickness or 'kerf' to the laser itself, something like 0.001".  But that can vary depending on how much power you send to the laser, and how fast it moves.  I've already done some experimentation with that.
Blue on the other hand works way more than a printer, it can vary intensity based on the strength of the blue, again depending on power and speed settings. 

Hopefully  this week I will get some time to run some trial cuts and see if it fits.


This is a closeup of the design. You can see that long blue lines engrave the planks into the wood, then by cutting a dashed line over the engraved line, it sort of simulates the cross planks. Just as in the nautilus deck.

Offline billp51d

  • Lt Cdr
  • *
  • Posts: 194
  • Gender: Male
Re: 1/72 Revell Type VIIC/41
« Reply #18 on: 28 Aug , 2015, 07:28 »
  TristanR...
       "Ready to join halves" .. You're going to want to mount this "beauty" when
        complete. It might be wise to consider how.. What i've seen on this forum
        is the practice of glueing/epoxying a nut in keel. Never cared to secure
        anything metal in this fashion. I prefered instead to C/A a piece of square
        plastic to one half of the inside keel (adheres better than metal). Join the halves,
        then drill and tap through the bottom. Better yet, if you use "heli-coils)
             " I sure miss working in a machine shop. 3-d printer was a plus"
         BILL


« Last Edit: 28 Aug , 2015, 07:32 by billp51d »

Offline TristanR

  • Lieutenant (jg)
  • *
  • Posts: 62
Re: 1/72 Revell Type VIIC/41
« Reply #19 on: 28 Aug , 2015, 20:35 »
Thanks Bill, again you raise another excellent point that I have not thought about at all!  I like your idea of heli-coils ( I had to google them)  They are a type of self tapping thread?

Also I would love to hear any suggestions for a boat number to assign to this model , I'd like to do an arctic paint job, but cannot find much reference to actric /41s.


I'm spending a small fortune in basswood now (luckily it's only $2 a sheet).  This pressure hull is three sheets, and I'm on the fifth revision!  Each revision lets me tune the sizes to it fits better with each one.


I had to make an allowance for the periscope recess, which is the styrene tube half way along this middle section.


The forward section is getting busier, it has to hold a few baffles and so on that might be seen through the flood holes. Kind of looks like a klingon dagger or something.


In place you can see how the baffle fits. I cut it separatle in case I needed to move it around, but I think it fits well enough that I can make it part of the main spine piece.


From the front. I still need to mount the torpedo doors.


Along the top, I will cover this with styrene.


Better check the deck still fits.


I think I have the kit bulkheads matched too, so I can use these wood ones instead that don't go all the way to the top.


Now the bad news.  I'd like to show the hatch that sits in here, but awesomely, the hatch falls exactly on top of the bulkhead sandwich of important structure. bugger.


Here is where the hatch should be.


Also, the is another torpedo loading hatch right here... Oh great that also goes through the other structural bulkhead.


AND, my periscope allowance is to far forward...


I can live without making these changes I suppose, but the big one is that the middle section here is too short by about 4 mm. Dunno how that happened but since I have to fix this I might as well make the other changes, it would be cool to be able to open those hatches.


Cheers!

Offline billp51d

  • Lt Cdr
  • *
  • Posts: 194
  • Gender: Male
Re: 1/72 Revell Type VIIC/41
« Reply #20 on: 29 Aug , 2015, 07:32 »
 
  TristanR...
     I mentioned "Helicoils" only because I had a large selection at the shop I worked
     at. They are used to put steel threads into soft material, aluminum, plastics
     and even wood. You can probably get away with just drilling and tapping the
     plastic ( as long as it's thick enough ). I mean how many times are you going
     to want to dismount the model from the base ? Plastic threads should suffice !
     B.T.W. progress and workmanship impressive !!
           Regards, Bill in Delaware USA

Offline billp51d

  • Lt Cdr
  • *
  • Posts: 194
  • Gender: Male
Re: 1/72 Revell Type VIIC/41
« Reply #21 on: 29 Aug , 2015, 07:48 »
 TristanR..
     Here is a list of boats from u-boat.net assigned to arctic waters..
     May be of some help...
   
     http://uboat.net/flotillas/11flo.htm
 
    Bill

Offline falo

  • Admiral
  • *
  • Posts: 514
  • Gender: Male
Re: 1/72 Revell Type VIIC/41
« Reply #22 on: 29 Aug , 2015, 07:55 »
Hi TristanR,

thanks for that great report here.

There is a full color scheme in "U Boot in Focus" #4. It is called "U 307 the north sea boat with the ice scheme". Drawing scale is 1/100. U Boot in Focus labeled the scheme as "an unusual camouflage".

Regards
falo

Offline falo

  • Admiral
  • *
  • Posts: 514
  • Gender: Male
Re: 1/72 Revell Type VIIC/41
« Reply #23 on: 30 Aug , 2015, 03:25 »
Hi TristanR,


just in addition: Please follow this link to a german forum, this guy built U 307 and used the mentioned color scheme from "U-Boot im Focus":


http://www.modellboard.net/index.php?topic=30803.0


Regards
falo


Offline pumpjet

  • Ensign
  • *
  • Posts: 27
  • Gender: Male
Re: 1/72 Revell Type VIIC/41
« Reply #24 on: 30 Aug , 2015, 07:13 »
TristanR

What kind of laser do you have?? Who makes it??

Bob

Offline TristanR

  • Lieutenant (jg)
  • *
  • Posts: 62
Re: 1/72 Revell Type VIIC/41
« Reply #25 on: 30 Aug , 2015, 16:32 »
Hi Bob, the Laser cutter is an Epilog Helix 60 watt CO2 laser.


here's a video of it in action.  It has 2 modes, engraving and vector cutting.  It's not mine they have one at work.  It's also very powerful, to cut this 1/16 basswood I generally have it set to 10% power.

https://www.youtube.com/watch?t=10&v=dMdoz3XDX_0


Hi Falo, Thankyou very much for the information and links to u-307, I have ordered u-boot im focus #4, depending on what exhasut and schnorkel it has, i think I may have found my number!  Thankyou very much!


Thanks Bill, since you mentioned mounting I have been investigating on how I want to mount it, which has led me into display cases too, another thing I have not investigated before, thanks!

Offline TristanR

  • Lieutenant (jg)
  • *
  • Posts: 62
Re: 1/72 Revell Type VIIC/41
« Reply #26 on: 30 Aug , 2015, 16:40 »
Also, Maybe you guys can help me with another issue,


I am trying to work out how the saddle tanks blend into the main pressure hull, in the shot above you can clearly see a step in the foreground between the saddle tanks and the main hull, yet a bit further back, you can see on the startboard side that it looks as if the step is gone and the saddle tank blends straight into the hull?  Cross sections I've seen on plans also show that sometimes there is a step and sometimes there isn't.  So my question is, does anybody know the details of how the saddle tanks attach to the pressure hull, and how far this step extends?

Offline TristanR

  • Lieutenant (jg)
  • *
  • Posts: 62
Re: 1/72 Revell Type VIIC/41
« Reply #27 on: 03 Sep , 2015, 13:41 »
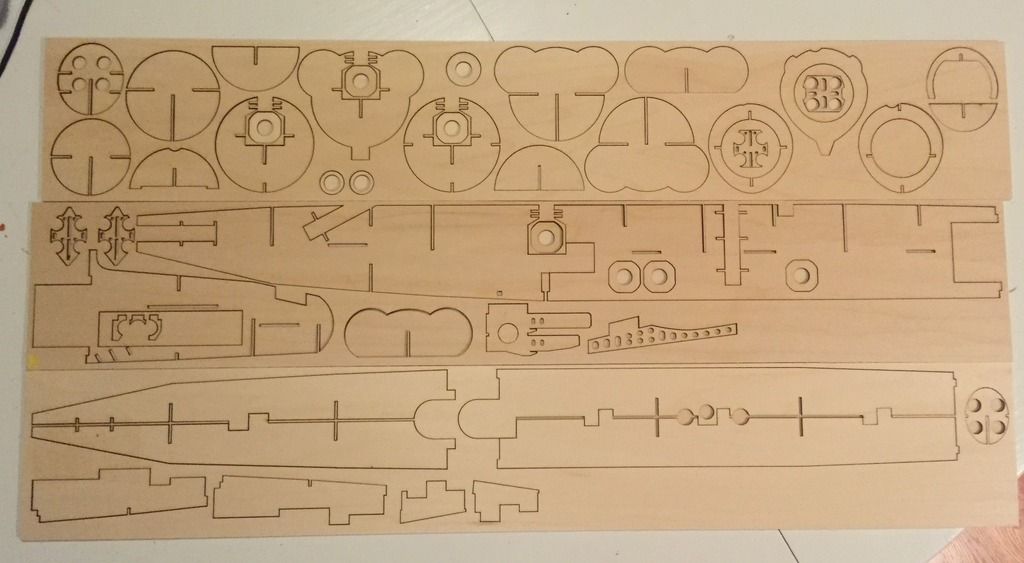
Version 5 of the pressure hull, trying not to take up more than 3 basswood planks. 


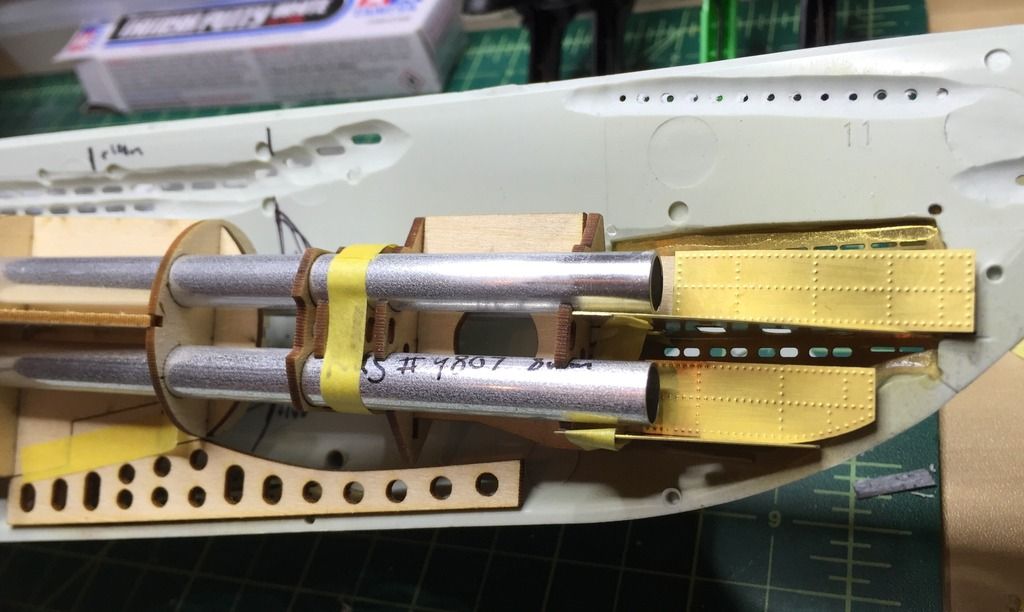
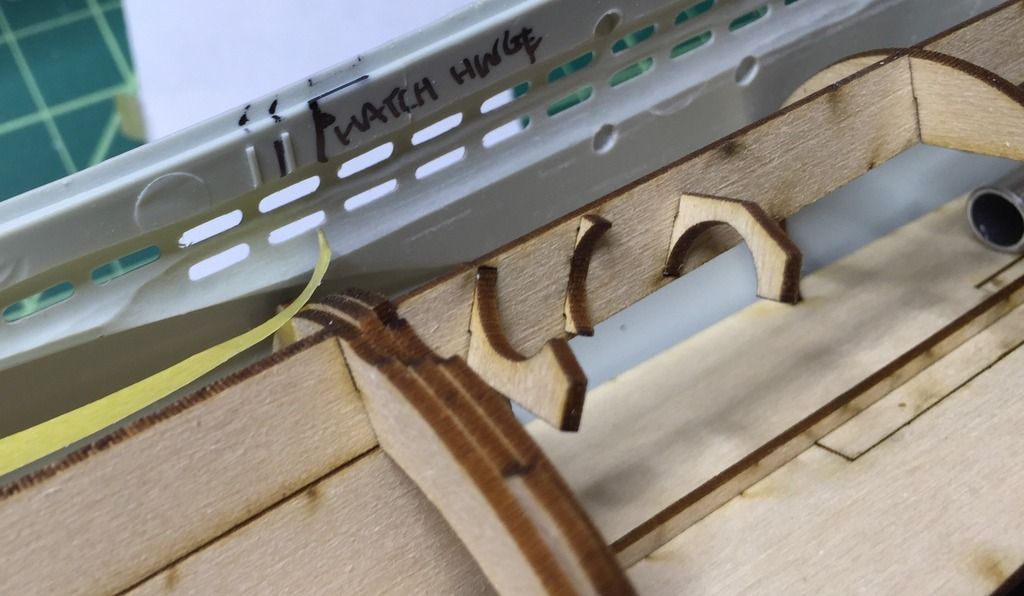
I have incorporated a little shelf to suppost the horizontal brass pieces that sit accross the torpedo door opening, it sort of fits ok, but not 100% yet.


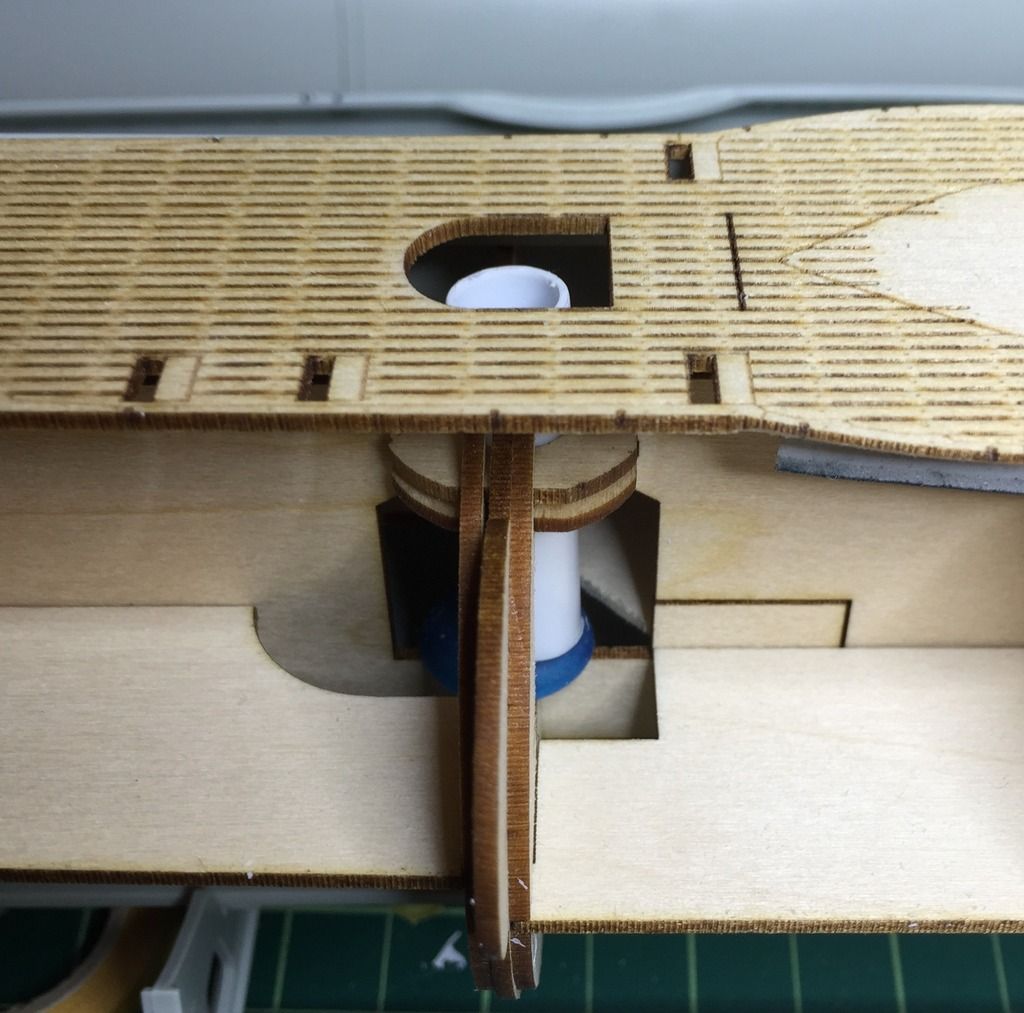
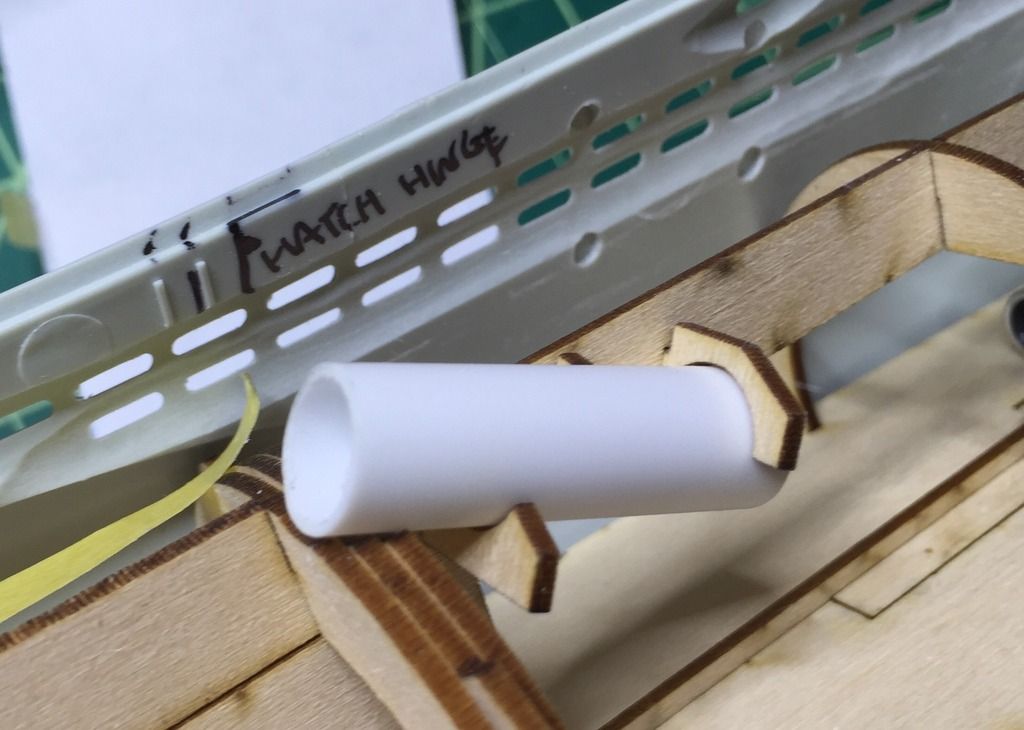
I made a holder to support some tube for the position of the torpedo loading hatch, the angle is 28 degrees, which is a guess.


The rear bulk head now has a tube holder for the rear loading hatch, in case I want that open.


Offline billp51d

  • Lt Cdr
  • *
  • Posts: 194
  • Gender: Male
Re: 1/72 Revell Type VIIC/41
« Reply #28 on: 03 Sep , 2015, 16:49 »
     TristanR.... Definately "Arctic Boat" U-601


« Last Edit: 03 Sep , 2015, 16:54 by billp51d »

Offline SG

  • Admiral
  • *
  • Posts: 660
    • https://3xblackcats.wordpress.com/
Re: 1/72 Revell Type VIIC/41
« Reply #29 on: 05 Sep , 2015, 09:49 »
TristanR, first of all congrats for the excellent progress.
I sense you're already familiar with these three shots, anyway that's the best I could find to help you. I hope they help somehow.
(notice how grossly the pics were retouched at the time ;D )
Keep up the excellent work!
SG


« Last Edit: 05 Sep , 2015, 09:51 by SG »